Assembling a Happy Hut tent can be a fun and rewarding experience, but it can also be a bit challenging if you’re not sure where to start. In this article, we’ll provide you with some tips and tricks to make the assembly process as easy and quick as possible.
The first step in assembling your Happy Hut tent is to carefully read the assembly instructions that come with the tent. These instructions will provide you with a step-by-step guide on how to set up the tent, including which pieces go where and in what order. It’s important to follow these instructions closely to ensure that your tent is assembled correctly and safely.
Before you begin assembling your tent, it’s a good idea to lay out all of the pieces and make sure that you have everything you need. This will help you avoid any delays or confusion during the assembly process. It’s also a good idea to have a clear, flat area to work in, as this will make it easier to lay out the pieces and assemble the tent.
Once you have all of your pieces laid out and ready to go, start by assembling the frame of the tent. This typically involves connecting the poles together and then inserting them into the corresponding sleeves on the tent fabric. Make sure to secure the poles in place according to the instructions to ensure that the frame is sturdy and stable.
Next, you’ll want to attach the tent fabric to the frame. This may involve sliding the fabric over the frame or clipping it in place, depending on the design of your tent. Make sure that the fabric is securely attached to the frame to prevent it from coming loose during use.
Once the tent fabric is attached to the frame, you can start setting up any additional features, such as windows, doors, or rain flys. Again, make sure to follow the instructions carefully to ensure that these features are installed correctly.
Finally, once everything is in place, take a few moments to double-check that all of the pieces are secure and that the tent is set up correctly. This will help prevent any issues during use and ensure that your tent is safe and stable.
In conclusion, assembling a Happy Hut tent can be a straightforward process if you take the time to read and follow the assembly instructions carefully. By laying out all of the pieces beforehand, assembling the frame, attaching the fabric, and setting up any additional features, you can have your tent up and ready to go in no time. Remember to double-check your work before using the tent to ensure that it is safe and secure. With these tips in mind, you’ll be enjoying your Happy Hut tent in no time.
Step-by-Step Guide to Setting Up Your Happy Hut Tent
Setting up a Happy Hut tent can be a fun and rewarding experience, but it can also be a bit daunting if you’re not sure where to start. In this step-by-step guide, we will walk you through the process of assembling your Happy Hut tent so that you can enjoy your outdoor adventures with ease.
The first step in setting up your Happy Hut tent is to find a suitable location. Choose a flat and level area that is free from rocks, sticks, and other debris that could damage the tent floor. Once you have found the perfect spot, lay out the tent body and groundsheet in the desired position.
Next, assemble the tent poles by connecting the sections together. Make sure that each pole is fully extended and that the shock cords are securely in place. Insert the poles into the corresponding sleeves on the tent body, starting with the longest pole and working your way to the shortest pole.
Once the poles are in place, secure them by attaching the pole clips to the tent body. Make sure that each clip is securely fastened to the pole to ensure that the tent is stable and secure. If your tent has a rainfly, now is the time to attach it by securing the clips to the poles and adjusting the tension straps as needed.
After the rainfly is in place, stake down the tent by inserting the stakes through the loops on the tent body and hammering them into the ground. Make sure that the stakes are driven in at a 45-degree angle to ensure that they are secure and will not come loose in windy conditions.
Once the tent is staked down, adjust the tension straps on the rainfly and tent body to ensure that the tent is taut and secure. Check all of the seams and zippers to make sure that they are properly aligned and closed to prevent any leaks or drafts.
Finally, step back and admire your handiwork. Your Happy Hut tent is now fully assembled and ready for you to enjoy. Whether you’re camping in the mountains, lounging on the beach, or just spending a night in the backyard, your Happy Hut tent will provide you with a comfortable and cozy shelter for all of your outdoor adventures.
In conclusion, setting up a Happy Hut tent is a straightforward process that can be completed in just a few simple steps. By following this step-by-step guide, you can ensure that your tent is properly assembled and ready for whatever outdoor activities you have planned. So grab your gear, head outside, and enjoy all that nature has to offer in your Happy Hut tent.
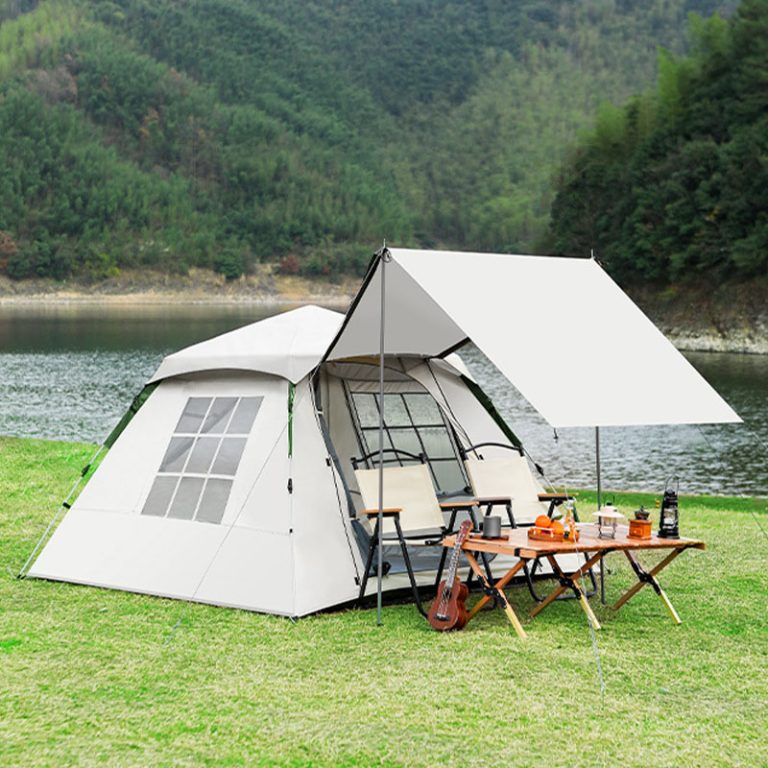
Top 10 large family tents for Outdoor Adventures When it comes to outdoor adventures with the whole family, having a large family tent is essential. A large family tent provides ample space for everyone to sleep comfortably and store their belongings. With so many options available in the market, it can be overwhelming to choose…
Creative T-Shirt Rack Display Ideas for Retail Stores Creative T-Shirt Rack Display Ideas for Retail Stores When it comes to retail stores, creating an eye-catching display is crucial to attract customers and increase sales. One effective way to showcase your merchandise is through a well-designed t-shirt rack display. A t-shirt rack display not only organizes…
Essential Tips for a Successful family tent setup Setting up a family tent can be a daunting task, especially if you are new to camping or have a large family. However, with a little planning and preparation, you can ensure a successful and stress-free tent setup experience. In this article, we will provide you with…
Top Features of the torreya tent 6-person 3-season The torreya tent 6-person 3-season is a top-of-the-line camping tent that offers a spacious and comfortable shelter for outdoor enthusiasts. With its durable construction and innovative design, this tent is perfect for camping trips in all seasons. In this article, we will explore some of the top…
The Benefits of Using a quechua pop up tent for 2 People The Benefits of Using a quechua pop up tent for 2 People When it comes to camping, having a reliable and easy-to-use tent is essential. One popular option that many campers swear by is the quechua pop up tent for 2 people. This…
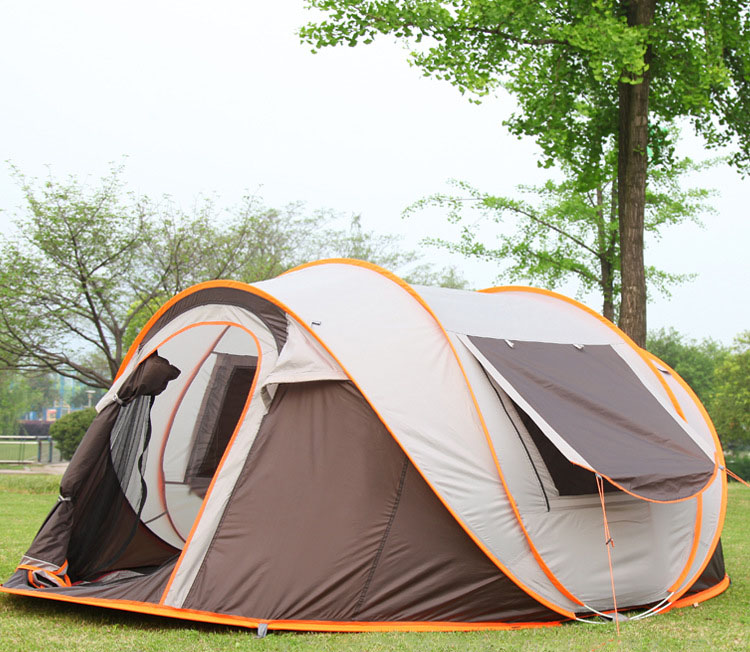
Quick and Easy: Setting up the Oztrail Fast frame tent Setting up a tent can be a daunting task, especially if you’re not familiar with the process. However, with the Oztrail Fast frame tent, the setup is quick and easy, making your camping experience hassle-free. In this article, we will guide you through the steps…

 Finally, once everything is in place, take a few moments to double-check that all of the pieces are secure and that the tent is set up correctly. This will help prevent any issues during use and ensure that your tent is safe and stable.
 In conclusion, assembling a Happy Hut tent can be a straightforward process if you take the time to read and follow the assembly instructions carefully. By laying out all of the pieces beforehand, assembling the frame, attaching the fabric, and setting up any additional features, you can have your tent up and ready to go in no time. Remember to double-check your work before using the tent to ensure that it is safe and secure. With these tips in mind, you’ll be enjoying your Happy Hut tent in no time.